Feature/Tutorial: Mechanized Life FilterCam
The FilterCam, from Mechanized Life. Version 2.0 was just released, and it adds a more user-friendly menu and more filters to the last version. This tool — it’s amazingly awesome. You want one. It’s easy to use right out of the box, and it’s also easily customizable with a bit of effort. This will be a rather long post, so make yourself comfortable.
Getting started, the HUD attaches to your center HUD attachment point. You’ll then want to go to File>Take Snapshot and check the “Show HUD objects in snapshot” box. You’ll also want to remove any other HUDs, as they too will end up in your picture if you don’t do so. (If you look at the pictures below, you’ll see HUDs I should have removed, but I forgot. Don’t look silly like me.)
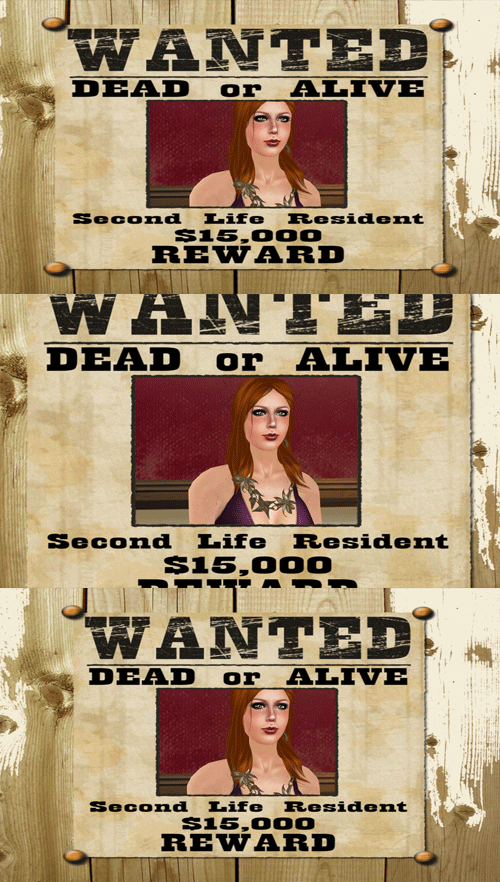
Initially, you’ll also want to run through three basic chat commands: “/5normal” “/5widescreen” and “/5ultrawide”. These set the aspect ratio of the HUD to fit with your monitor aspect ratio. I find the “Wanted” filter useful for determining which aspect ratio looks best. Once you’ve found the correct setting for you, you’ll never have to fuss with this again.
To get started using the FilterCam, there are only two things you need to know. First, a long click on the HUD will bring up your blue-box menu, from which you can choose from a large selection of filters. Your blue box menu first presents several categories: Scatter, TV, Frames, Holidays, Horror, Artsy, Basic, and Custom (more on custom later). Each category, when clicked, will show you several preset filters, all ready for you to use and take pretty pictures.
Second, a short click on the HUD will minimize it, allowing you to set up your composition, camming and alt-clicking and so on. Clicking on the minimized HUD will bring it back to full-screen size. I usually go back and forth with the minimizing, to make sure the shot is framed exactly the way I would like.
So, neat, you say. But what if none of the preset filters are exactly what you’re looking for? This is a powerful tool, with endless customization possibilities. In order to take full advantage of its potential, one must understand how the tool works. The HUD is composed of four layers — you can think of these as old-school transparencies, or tracing paper, or layers in a photo-editing software. On each layer, you can assign a transparent image, or mask, and adjust the tint, transparency, and glow. The FilterCam already contains a good variety of masks — some are basic frames; some are atmospheric effects; some are more like scrap-booking. One, the ruleofthree, is a useful compositional tool for arranging major elements in a photo.
Personally, I found it useful to right-click>edit the HUD and get into contents and see exactly what masks were available in the HUD, and get a feel for how I’d use them. These masks are the building blocks, the major elements, in creating your own filters. I’ve grouped them into my own totally arbitrary categories, which differ slightly from the categories in the blue box menu.

First are the basic framing masks. Umm, they frame your picture in a basic way. They may not be flashy, but they offer elegance and structure.
I’ll be adding in wardrobe commentary through this portion, rather than at the end, to try and break up the headache-inducing line of animated gifs a bit. Wardrobe commentary will be in italics. The hair is Malou, a recent release from Maitreya, and I’ve been wearing it since it came out. It has a very natural RL feel that I can’t get enough of. The skin is Dinah in Fall from Tyranny Designs. This is one of three “Bare” faces, each with a different lip color, and each as a nice fresh-faced-while-still-wearing-makeup look that I enjoy.
Mouse Mimistrobell of Dark Mouse has begun creating her own sculpties, and I must say, this is some of my favorite jewelry she’s made so far. The earrings, necklace, and bracelets compliment each other without being too matchy-matchy. Large-scale and shiny, with organic, feminine shapes, I adore this set.

Next are what I call the scrapbooking masks. These are playful and fun.
The outfit consists of new releases from elymode: the angle-waist skirt, the short sweater, and the bodysuit. All three are available in six colors, on all layers, designed to mix and match. The bodysuit contains two versions: one solid-colored, and one with contrasting trim. As you can see, there are a variety of ways to combine these three elements (they’re equally versatile mixed in with other outfits.) As always, elymode clothing is exquisitely textured, with classic clean lines. I’m always impressed with the attention to detail; from a creator’s perspective, Ely always inspires me to work harder and be better at making my own stuff.

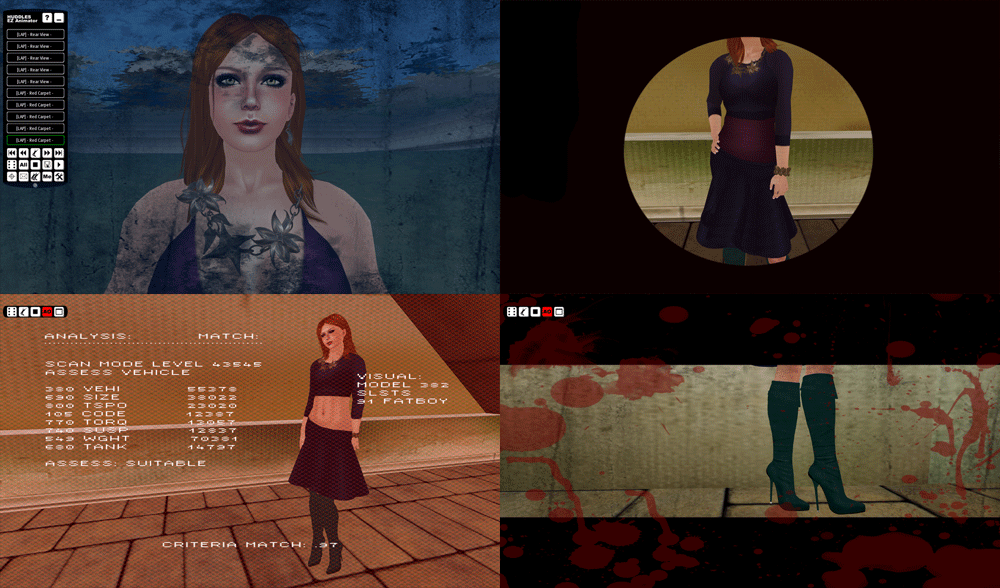
The atmospheric masks, as I like to think of them, are my favorite. These can give your photo a moody, arty feel. Most of the filters fall into this category for me, so take a minute to let the animation play through.
Now, the boots. Bax Coen‘s latest, a suede version of the amazing Prestige Boots. The texturing and shape are outstanding. Cuffs at the top can be turned up or turned down, and there are three colors of denim you can change the cuff to, if you don’t want them the same color as the boots. The resizing system took me a minute to get used to, but the fit afterward is perfect — unlike most resizing systems, this one allows you to adjust the width of the boot without adjusting the height.
I used the same pose set throughout the pictures — Long Awkward Pose‘s Red Carpet set. It may not be new, but it remains an classic choice. The poses are elegant and natural. All photos were taken at the Zaara sim. If you haven’t wandered around, you should — there are some beautiful spots both inside and outside the store.

Finally are the RP masks. I admit I don’t have much use for them, myself, but they look cool, and I’m sure they’d be amazing in someone else’s hands.
The masks provided are lovely on their own, and you can layer them over one another for complex effects, using the basic chat commands. To start, I’d go to your blue box menu and select “Basic” and then “Default.” From there, try typing in any of the commands on the masks I’ve shown above. There — now you’re changing the masks on the “0″ layer of the filter. Moving on, by typing, say, “/5mask 0 grunge” and “/5mask 1 haze”, you’d be assigning the grunge mask to the “0″ layer and the haze mask to the “1″ layer. Remember, you have a total of four layers, labeled 0, 1, 2, and 3 — you can assign a mask to each layer, like so:
You can also adjust the transparency, tint, and glow of each layer, whether or not it you’ve assigned a mask for that layer. We’ve already learned that the /5mask command controls the masks, or images, used. The /5filter command controls effects on a given layer. If you look at the atmospheric masks I showed above, you’ll see that the static mask has a second command listed: “/5filter 0 white .5 0″ So, let’s look at what each part of that command does.
Just like working with the /5mask command, the /5filter command controls layers “0″, “1″, “2″, and “3″. The color portion gets interesting — black blue gray green indigo magenta orange pink purple red turquoise violet white yellow cyan azure blueviolet brown and sepia are available, or you can use a specific vector color, like <1.0,0.5,0>.
The transparency, or alpha, option lets you control the transparency of the mask and/or assigned color on a given layer, and can be set anywhere from 0 to 1. (If you’re trying to assign a mask, and can’t see it, make sure that layer isn’t set to 0 here.) Finally, the last part of the command controls the glow. It too can be set anywhere from 0 to 1. I don’t care for glow, myself, so I keep this set at 0, but play with it and see what works for you.
If you find a specific combination you enjoy, you can save it to be a preset in the menus. Awesome, right? (You’ll have to read the included instructions for this part, though you should read them anyway — there’s a lot I’m not covering.) But you’re not just limited to the included masks. This is where, for me, FilterCam is an enormously powerful tool. You may have noticed I favor square images, and I tend to use the same frame on all my en scene photos. It took a bit of tweaking to get my Photoshop file exactly the way I wanted for uploading, but check this out.
I created the frame I wanted, uploaded it in-world, dropped it into the HUD (read the directions for this!), and created a preset. Once I get used to using it, all I’ll need to do is take my pictures using the HUD and crop them. No more fussing in Photoshop. The ability to add your own filters makes this an invaluable tool for bloggers and creators, who use some of the same elements in every photo used. So, like I said, Mechanized Life FilterCam=Awesome. Easy to use for amateur photographers, and powerful enough for professional and business use.
Disclaimer: Promotional items included in this post: FilterCam, clothing, and boots. I’m acquainted with some of the designers shown here. However, I only blog things I like, regardless of affiliations or gifts.
9 Comments to Feature/Tutorial: Mechanized Life FilterCam
You are a goddess! Thank you for this tutorial! ![]()
Wow. That is amazingly thorough, and tremendously well illustrated. Kudos on a superb job covering this tool!
![]() Glad to be of help.
Glad to be of help.
*blushes* Thank you.
which pokeman is your favourite
I prefer She-Ra
Wow, I have loved filtercam a while now, but this is an amazing tutorial and a lovely read ![]()
Hey I’ve never realized what the filter cam is for! What a great post – I think I need to get one! Thank you!
[...] And from What? Another Fashion Blog?: Feature/Tutorial: MechanizedLife FilterCam [...]
Leave a comment
Search
Categories
Permanent Sponsors
Tags
Fashion Feeds
Cool Blogs
- A Second Look at Dark Mouse
- Achariya.net
- Ana Lutetia
- Anemysk [ glow ]
- Atomic Valley
- Brinksie
- Dot Lane, Girl Reporter
- Fade to Grey
- Fashion Junkie
- Frenzy Shoppers
- Hippo Athanatoi: Old Fashioned
- It's Only Fashion
- JuicyBomb
- Linka's Fashion
- Little Black Blog
- Luna Jubilee
- MichaMi Style
- More Than Meets the Eye
- My Way
- Phantom's Republic
- Sacred Fashion
- Sakinah Silks
- SasyPants
- Second Life® Fashion Addict
- Sheek
- Shopping Cart Disco
- SL Fashion Diva
- SL Revolution
- SL Style Hunter
- SLex and the City
- So Many Styles
- Strange Pixels
- The Hole in the Universe
- Timeless Agency
- Uma's Style Diary
- YoLo Skins
- Z…Complete


December 20, 2009